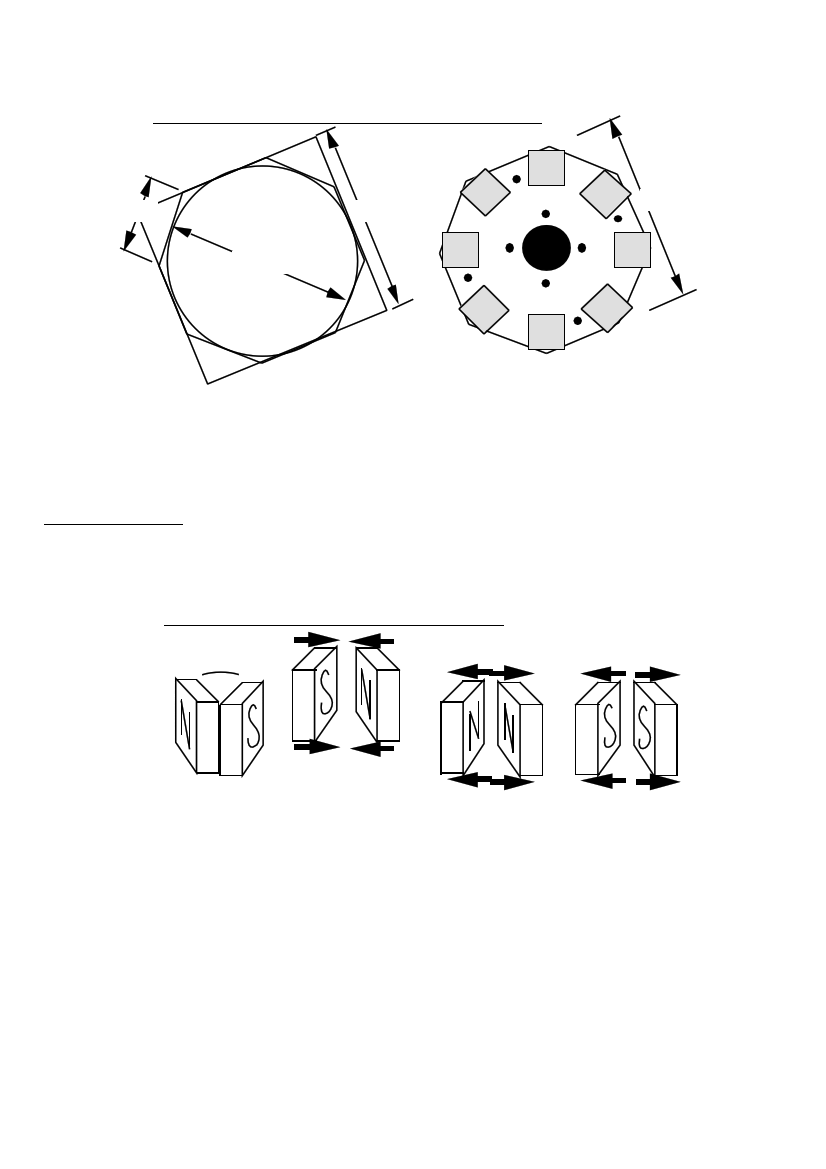
33. ALTERNATIVE SHAPE : AN OCTAGON
116 280mm
280mm
280mm
The central hole is made with a hole-saw or it can be cut out on a lathe.
Grind the steel disks until they are bright and clean, just before putting them in the
mould for resin casting. Remove any grease with spirits.
Magnet blocks
There are 8 magnet blocks on each rotor. Each block has a north pole and a south pole
(see diagram 34).
34. POLES ON THE MAGNET BLOCKS
EACH BLOCK HAS
A 'N' AND A 'S' POLE
POLES WHICH ARE THE SAME
REPEL EACH OTHER
N AND S POLES ATTRACT
EACH OTHER
Take care when handling the magnets. Magnets can damage floppy discs, music
tapes, credit cards and other magnetic media. Separate them from each other by
sliding them sideways. They attract each other with strong forces. Take care not to
let them fly together - they may break. Never use a hammer to assemble the PMG.
You may break a magnet or break the resin holding it.
The top faces of the magnet blocks on the disk must alternate N-S-N-S-... There is a
method to check that you are doing this correctly, as follows. Each time a magnet
block is placed, hold it so that it repels the one before (see diagram 35). Then place
it without turning it over. When they are all in, check with another magnet: it will
be attracted, repelled, attracted, repelled, by each magnet in the circle.
PMG manual
page 32
June 2001